
A few people have asked me to make them masks, and as I’m trying to make a bunch for my family and I’m sewing them all by hand, it is very time consuming and I don’t want to promise I can do it for them and then keep them waiting. So I put together this blog/tutorial of how I’m making the masks, and hopefully this is helpful to anyone out there who wants to make their own right now.
“CDC recommends wearing cloth face coverings in public settings where other social distancing measures are difficult to maintain (e.g., grocery stores and pharmacies), especially in areas of significant community-based transmission.
CDC also advises the use of simple cloth face coverings to slow the spread of the virus and help people who may have the virus and do not know it from transmitting it to others. Cloth face coverings fashioned from household items or made at home from common materials at low cost can be used as an additional, voluntary public health measure.”
You will need:
- To print the template I’m using. Print it as actual size (not “fit to page”). On standard 8.5×11 paper this will fit adult faces.
- I got the template from a woman on YouTube called Mimi G Style, you can watch her video by clicking here (she shows herself sewing with a machine, but it still could be useful to watch!).
- Fabric. I’ve read on a few blogs that “quilting cotton” is better to use for masks, but the CDC is recommending anything at this point. Before I bought some quilting cotton from Joann Fabric, I cut up some tshirts and pillowcases to make masks. Anything you have will do.
- Something for the ear loops/headband. Elastic is kind of hard to come by right now if you don’t already have it. I’ve also been using drawstrings from sweatpants/hoodies, shoelaces, ribbon.
- Needle and thread.
- Scissors.
- Sewing pencil or pen/marker to trace the pattern.
- Pins of some kind to hold your pieces together, I’ve been using tailor pins but safety pins/band pins/other sewing needles work too in a pinch.
I bought all my supplies from Joann Fabric, they have a whole section of their website devoted to mask making with even more videos and tutorials.
You will only need to know how to backstitch. Here is a tutorial if you do not know how to do this. Backstitching makes very durable seams.


Trace your pattern onto the “wrong” side of your fabric. You want to make two of each piece which will make up the outer and inner layers. The outer layer should be about an inch wider than the inner layer, so you can fold/loop the ear straps on later. Then cut out your pieces of fabric – you should have four total pieces!


Then, pair your two inner and outer layers together, with the “right” side of the fabric facing each other. Meaning, if you flip each pair over you should always be seeing the “wrong” side of the fabric now. It may help to pin them together if you can. Begin by sewing (backstitching) along the curved side of each layer. Doesn’t matter if it’s pretty, these seams will not be seen in the finished product.

With your outer (left, it’s longer!) and inner (right, it’s shorter!) pieces sewn along the curve, you can now fold over the top and bottom of your fabric. This is not necessarily a required step. It just helps you make cleaner/neater seams, and is good to consider doing if the fabric you’re using is fraying (or could fray). I just make very tiny folds and run over them with my fingernail or the edge of my scissors to press it.

This is where pinning will be VERY helpful. You are going to flip your pieces right side out (see the nice clean seam we made in the middle for the curve?). Then you match where the seams are on the outer and inner layers and pin there. You may also want to pin the edges of the inner layer down just so that they don’t flop around on you while you’re sewing, like I did in the photo above. Your mask is starting to take shape!
You are going to sew (backstitching all the way!) directly across the top and bottom of each piece. I like to do a few extra stitches where the outer and inner layers meet on the edges, and where the two center seams meet at the top and bottom – you can see how this will look in the photo below. Using backstitching, the back side of your mask (the inner layer, what will be on your face) may look like a hot mess, but the front will be mostly clean/fine. Also, it’s a pandemic right now so who cares if your stitches are a little sloppy?!
Once your top and bottom are sewn together, get whatever you’re using for your ear loops. about 6 to 8 inches is the sweet spot for ear loops, while 22 inches is better for a head band. In this blog, I’m doing ear loops. I didn’t have elastic here, so I cut up a drawstring from a hoodie, and then reinforced the ends so they didn’t fray more by just sewing over them A LOT – which you can see in my two ear loop pieces below!

Fold over the extra inch of fabric from your outer layer on each side, and in doing so use it to wrap the ear pieces in. Then, backstitch down the sides to secure those folds. Again, I like to do extra stitches at the top and bottom to not only reinforce the folds, but also the ear loops. This is what the finished mask looks like from the inside (what will be up against your face):

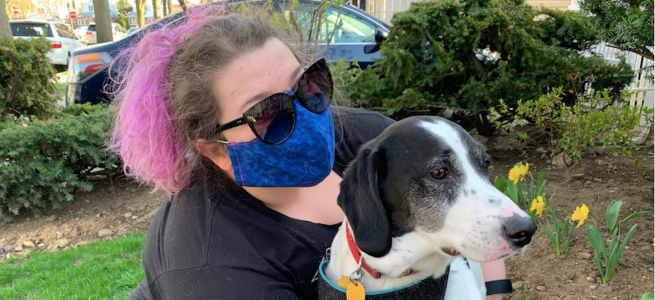
And, with that, you’re done! Below is what your mask will look like from the front (outer layer). This mask fits flush with my face and feels very secure when I wear it, and it covers my nose and mouth – which is key! It also doesn’t bother my ears.


Here are two photos of me wearing the mask I made for myself, so you can see how it looks on when it’s finished. I was able to wear my mask with my sunglasses over it and the glasses did not fog up on me. My brother who wears regular prescription glasses all the time is also able to wear his mask without having it fog on him.


Learn more about face masks on the CDC website by clicking here. They also provide their own easy to follow tutorials!
Stay safe!
If you enjoyed this or learned something, you can support my continued academic research and work by buying me a cup of coffee: https://ko-fi.com/valderie, becoming a patron: https://www.patreon.com/valderie, or making a one-time donation on paypal: http://paypal.me/valderie
